- Tutorials
- User Onboarding
User Onboarding
ElevateHQ lets you onboard multiple users seamlessly. In this tutorial, we will discuss how to add a new user to the system and assign a plan, team & quota for these users.
Step 1:
Log in to your ElevateHQ dashboard using your admin account.
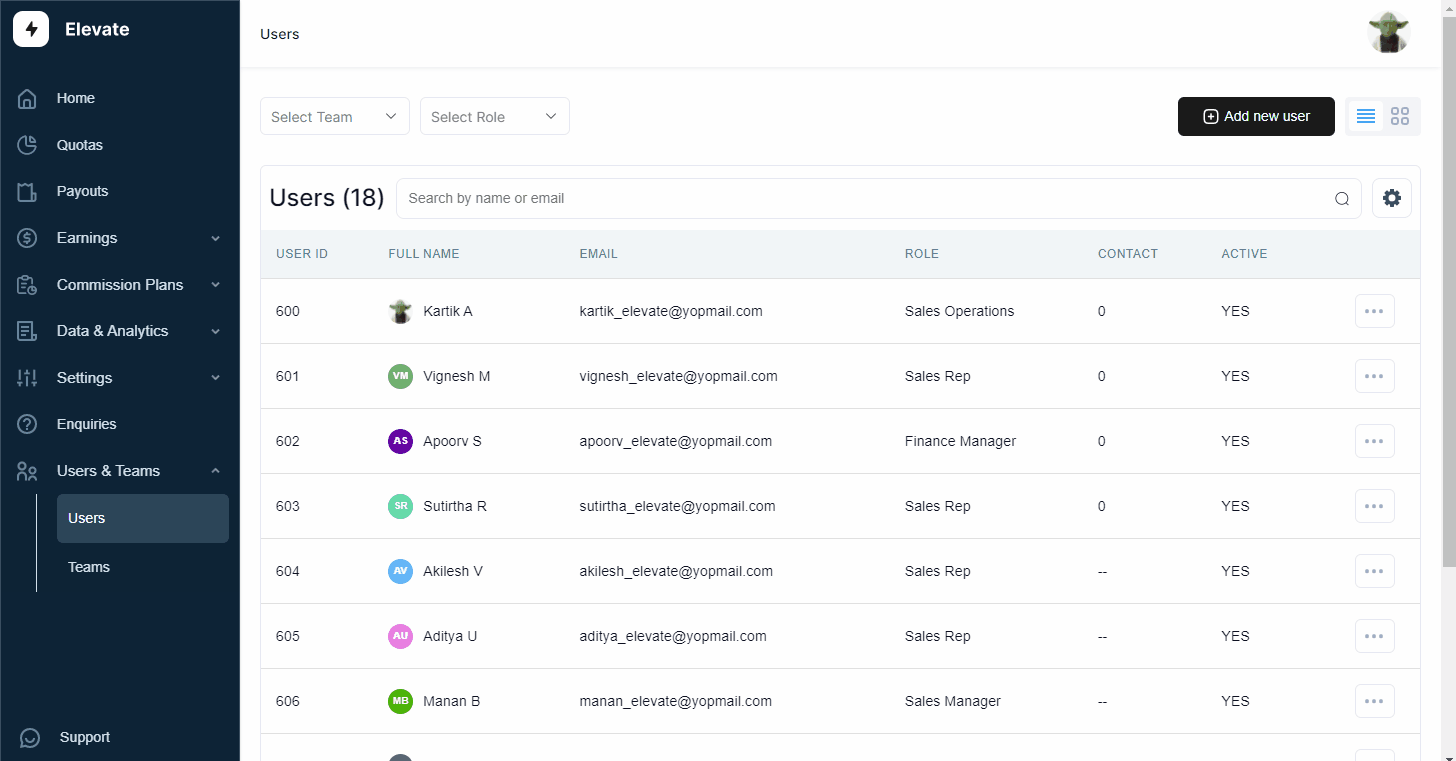
Step 2:
On the left side panel, under the “Users & Teams” section, select “Users”.
Step 3:
On the Users tab, select “Add new user” on the top right side of the dashboard.
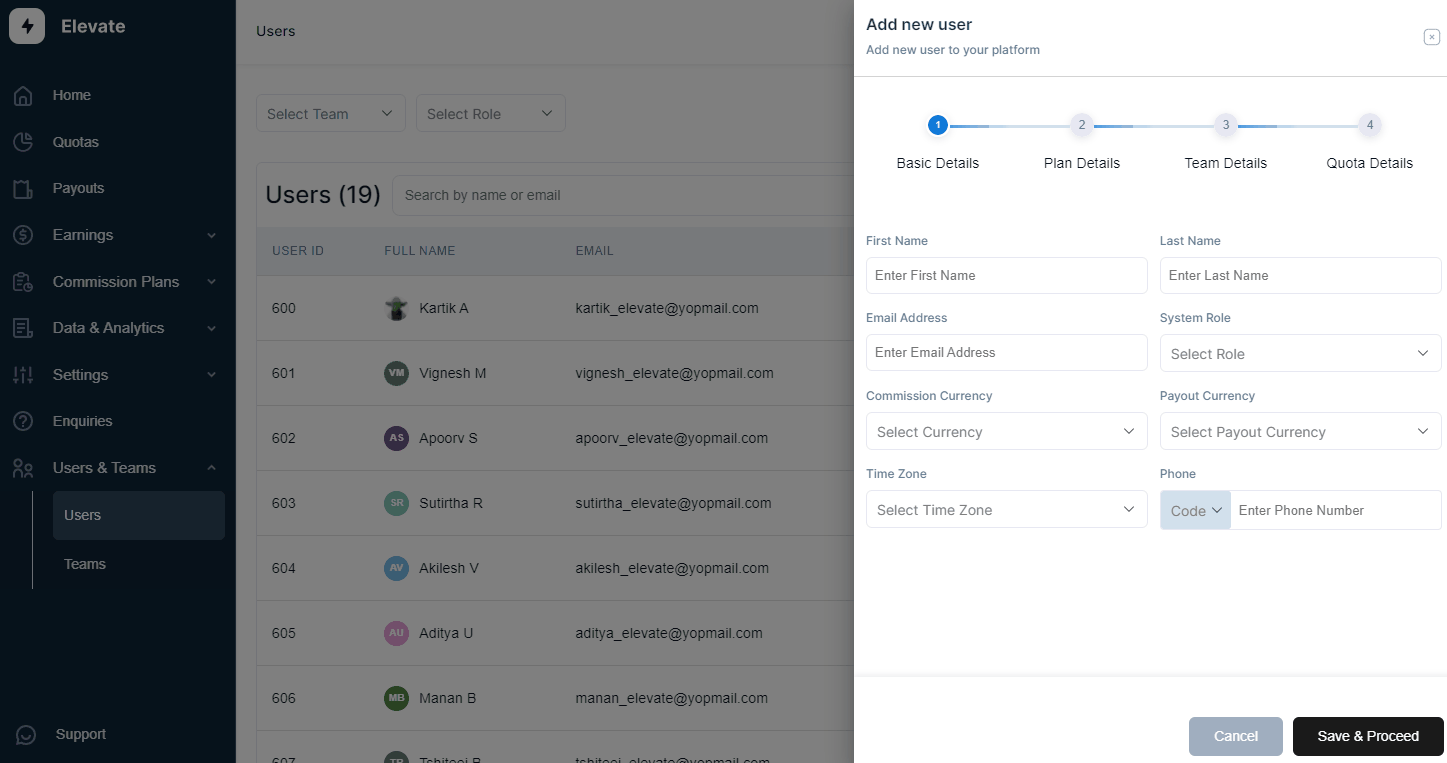
Step 4:
You will be prompted to fill in the details of the users such as First name, Last name, system role, commission currency, payout currency, etc. Once you have completed filling out the relevant details, select “Save & Proceed”
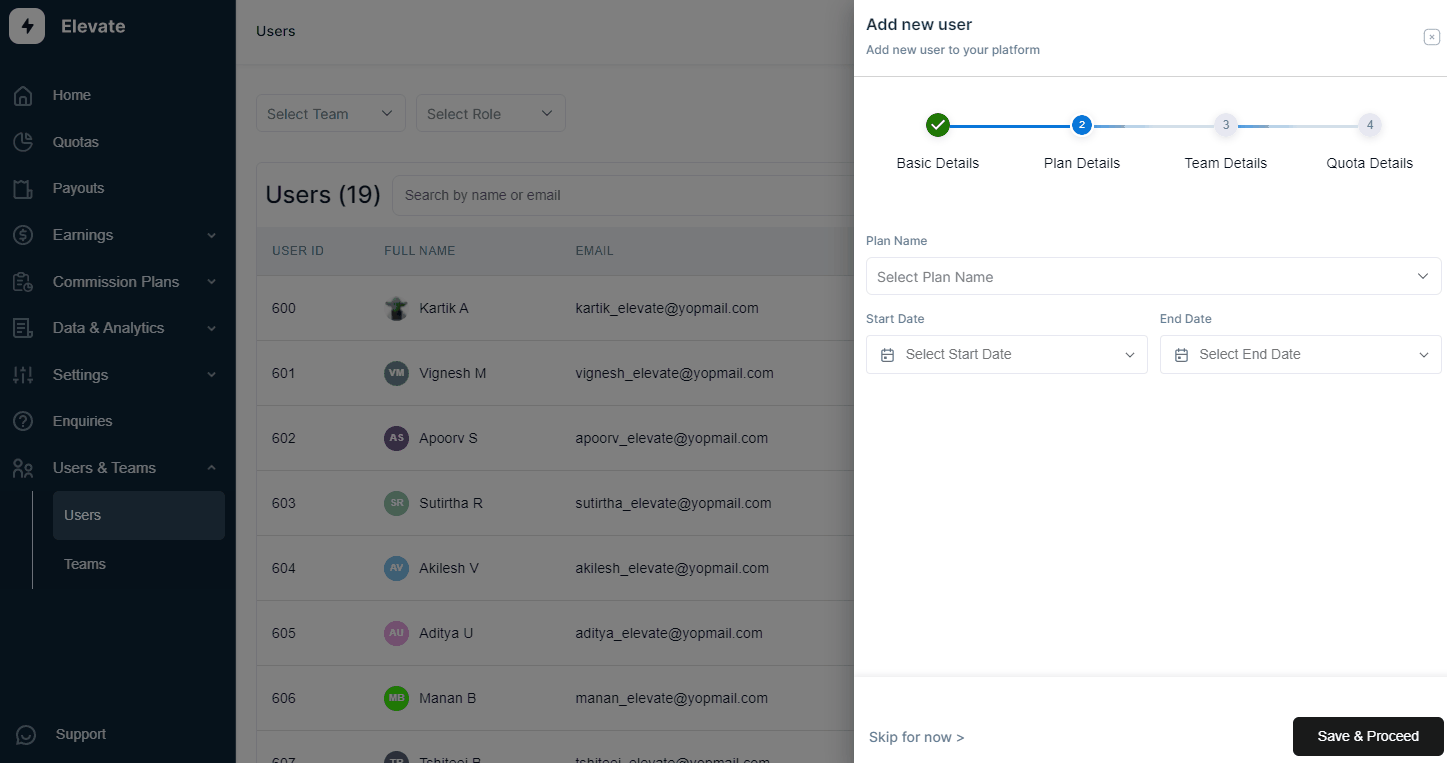
Step 5:
The system will then require you to fill out the plan details for the user such as plan name, start date & end date. Once you have filled in these details click “Save & Proceed”.
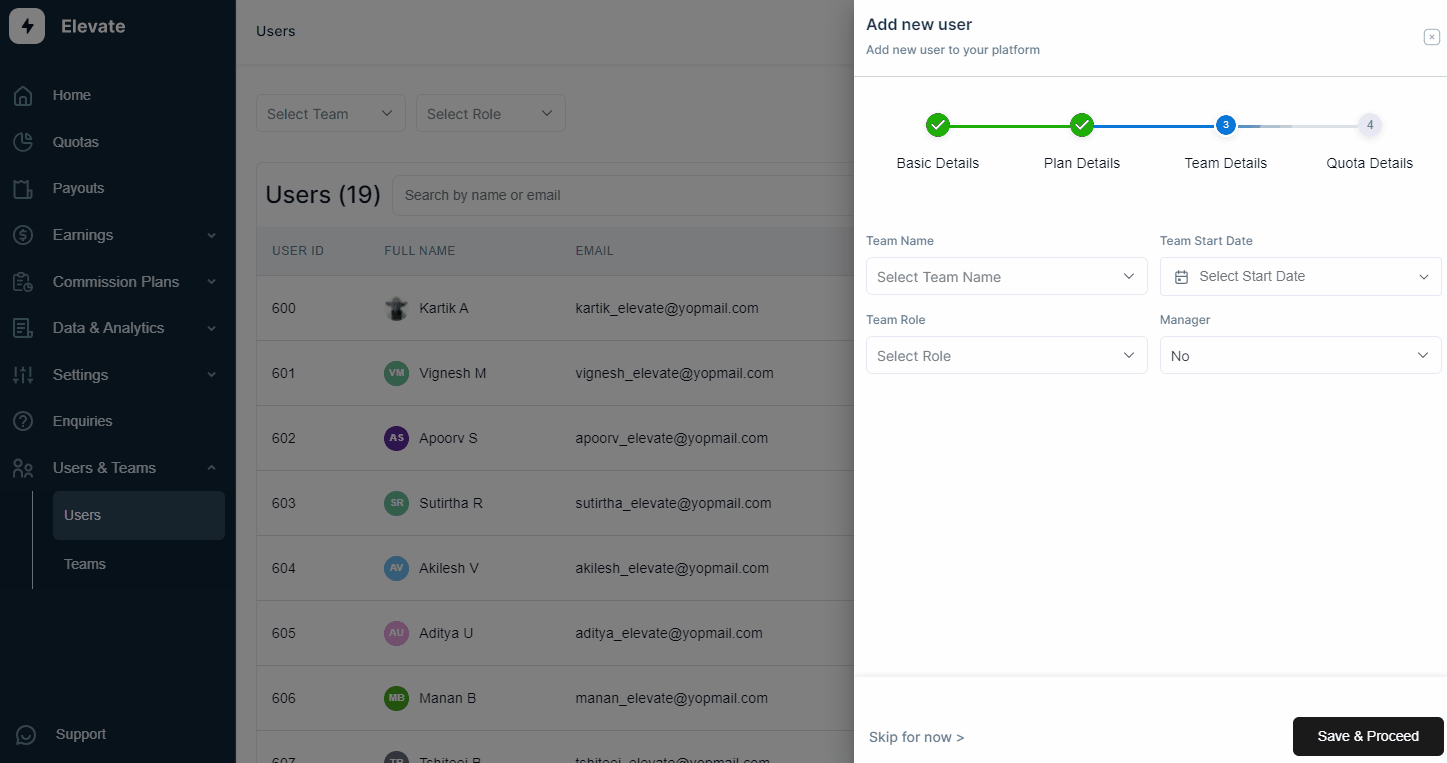
Step 6:
The system will then require you to fill out the team details for the user such as team name, team start date, team role, etc. Once you have filled in these details click “Save & Proceed”.
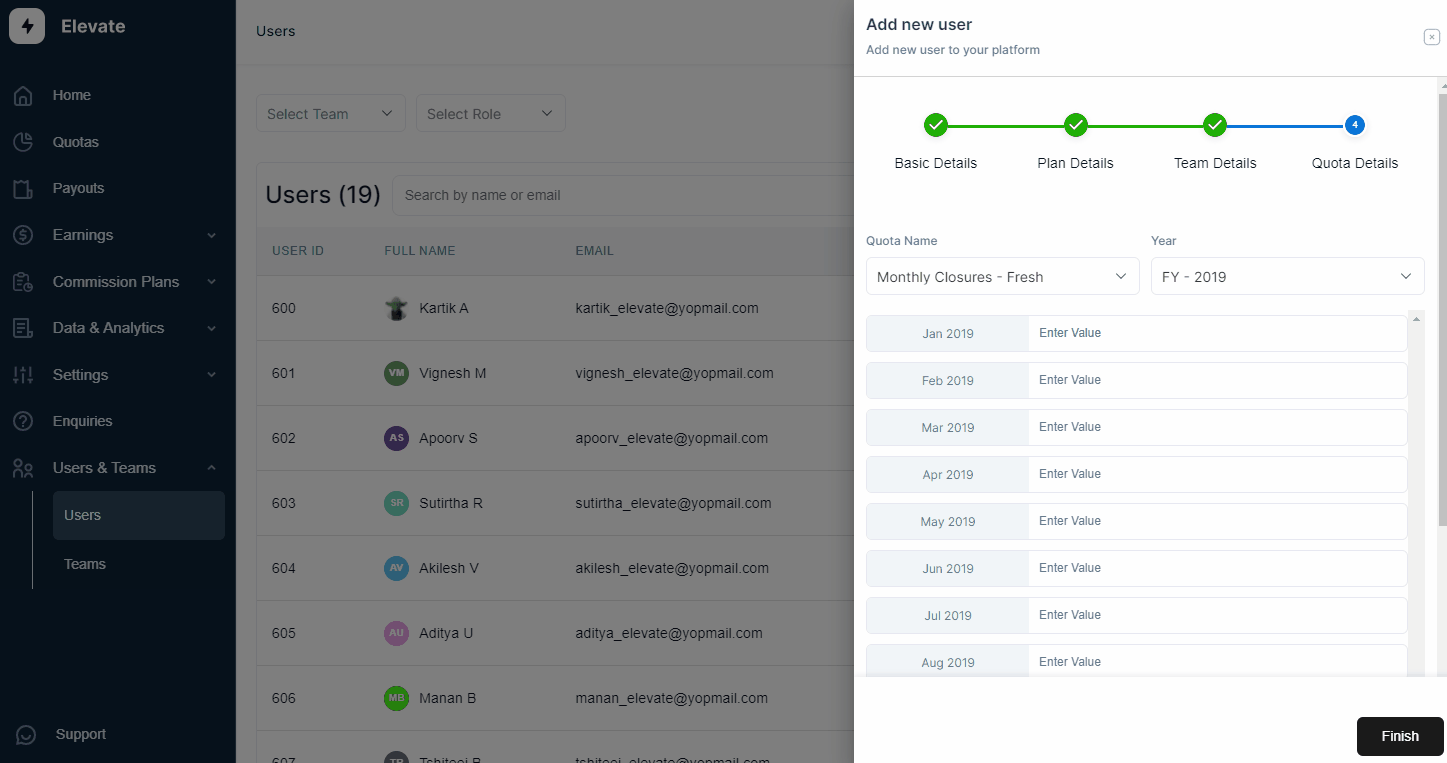
Step 7:
The final step will require you to add the quota name, financial year, and quota numbers for the specified months. Once you have filled in these details, click “Finish” and the user will be added to the system.
Related Links

Payouts
ElevateHQ Payouts manager lets you create timely payout batches...

Freeze
In this tutorial we will learn how to freeze a rep's commissions ...

Quota Ramp
Wish to create a quota ramp for a new employee? In this tutorial...