- Tutorials
- Manual Payouts
Manual Payouts
ElevateHQ Payouts manager lets you create timely payout batches for your teams. In this tutorial, we will learn how to create a payout batch for a team.
Step 1:
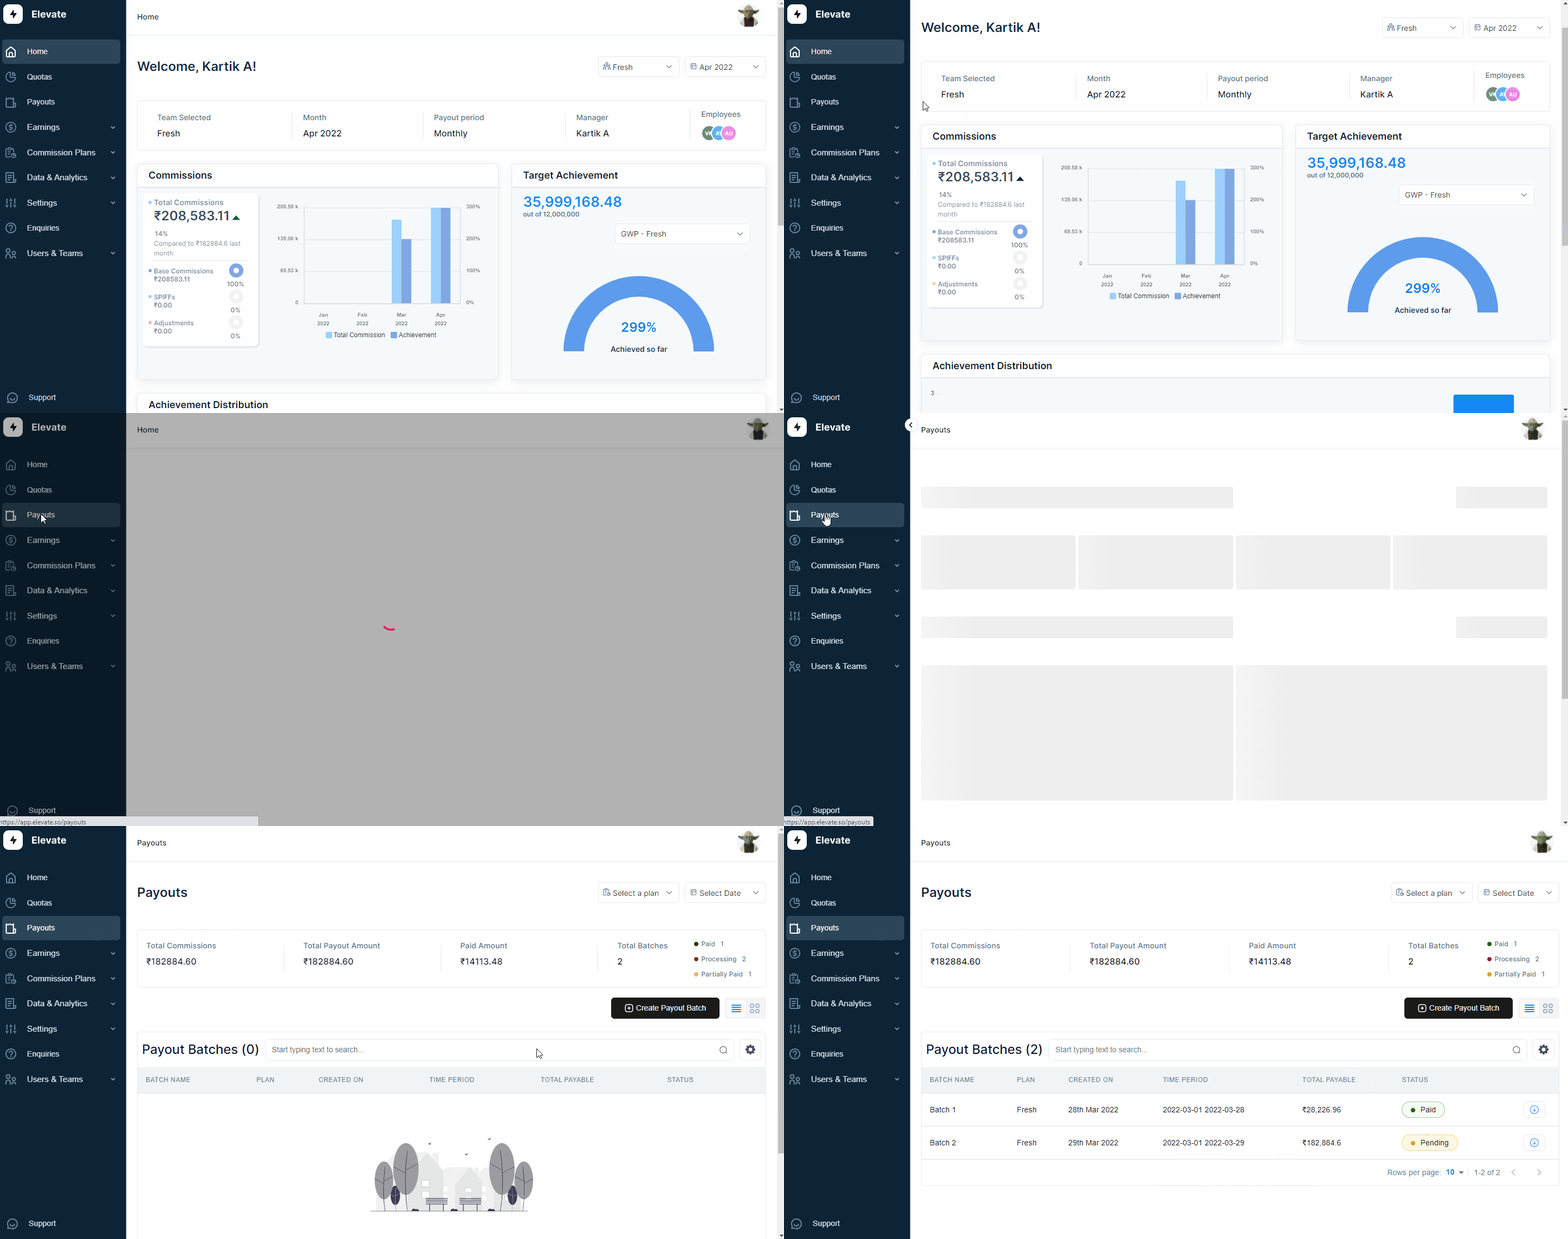
Log in to your ElevateHQ dashboard using your admin account. On the left side panel, select “Payouts”
Step 2:
On the payouts section, select “Create Payout Batch”.
Step 3:
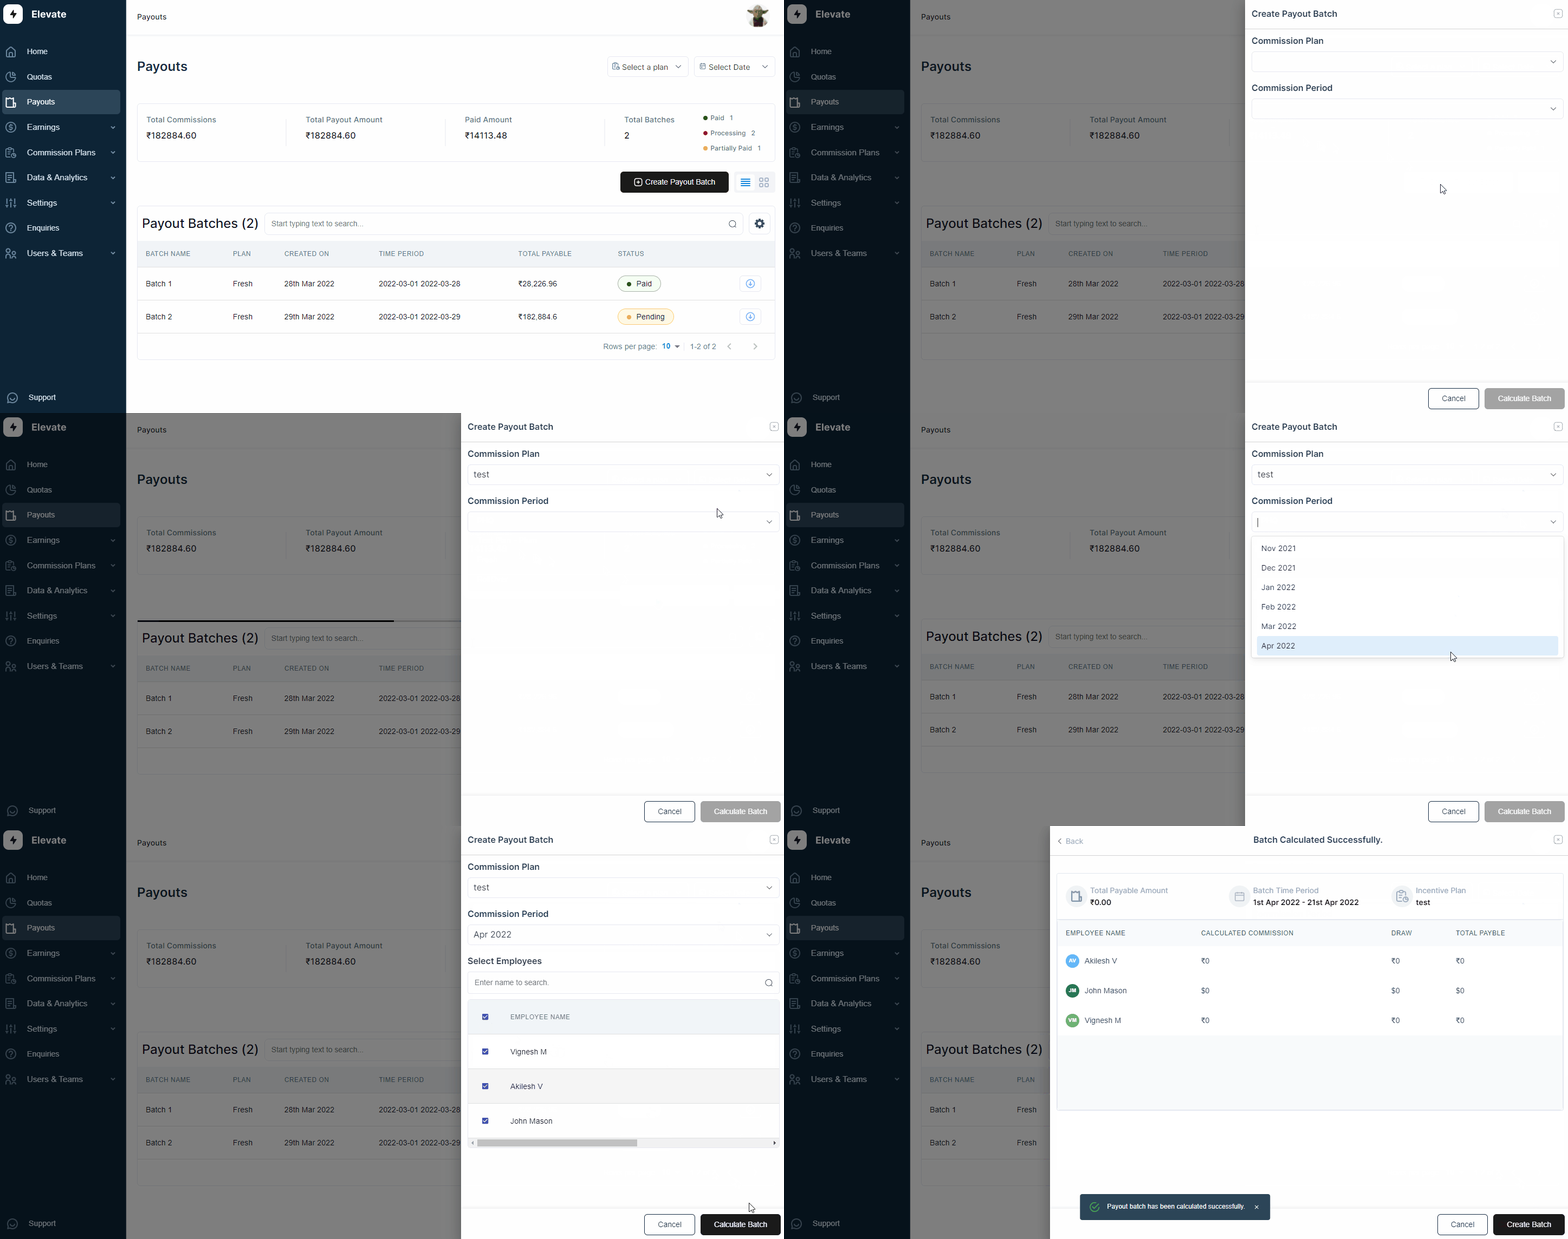
A new window will appear. Under Commission Plan & Commission period select the plan and the period for which you wish to create a payout. On selecting the plan and the period, the system will show you the list of employees under that plan. Select the employees for which you wish to create the payout. Then Select “ Calculate Batch”
Step 4:
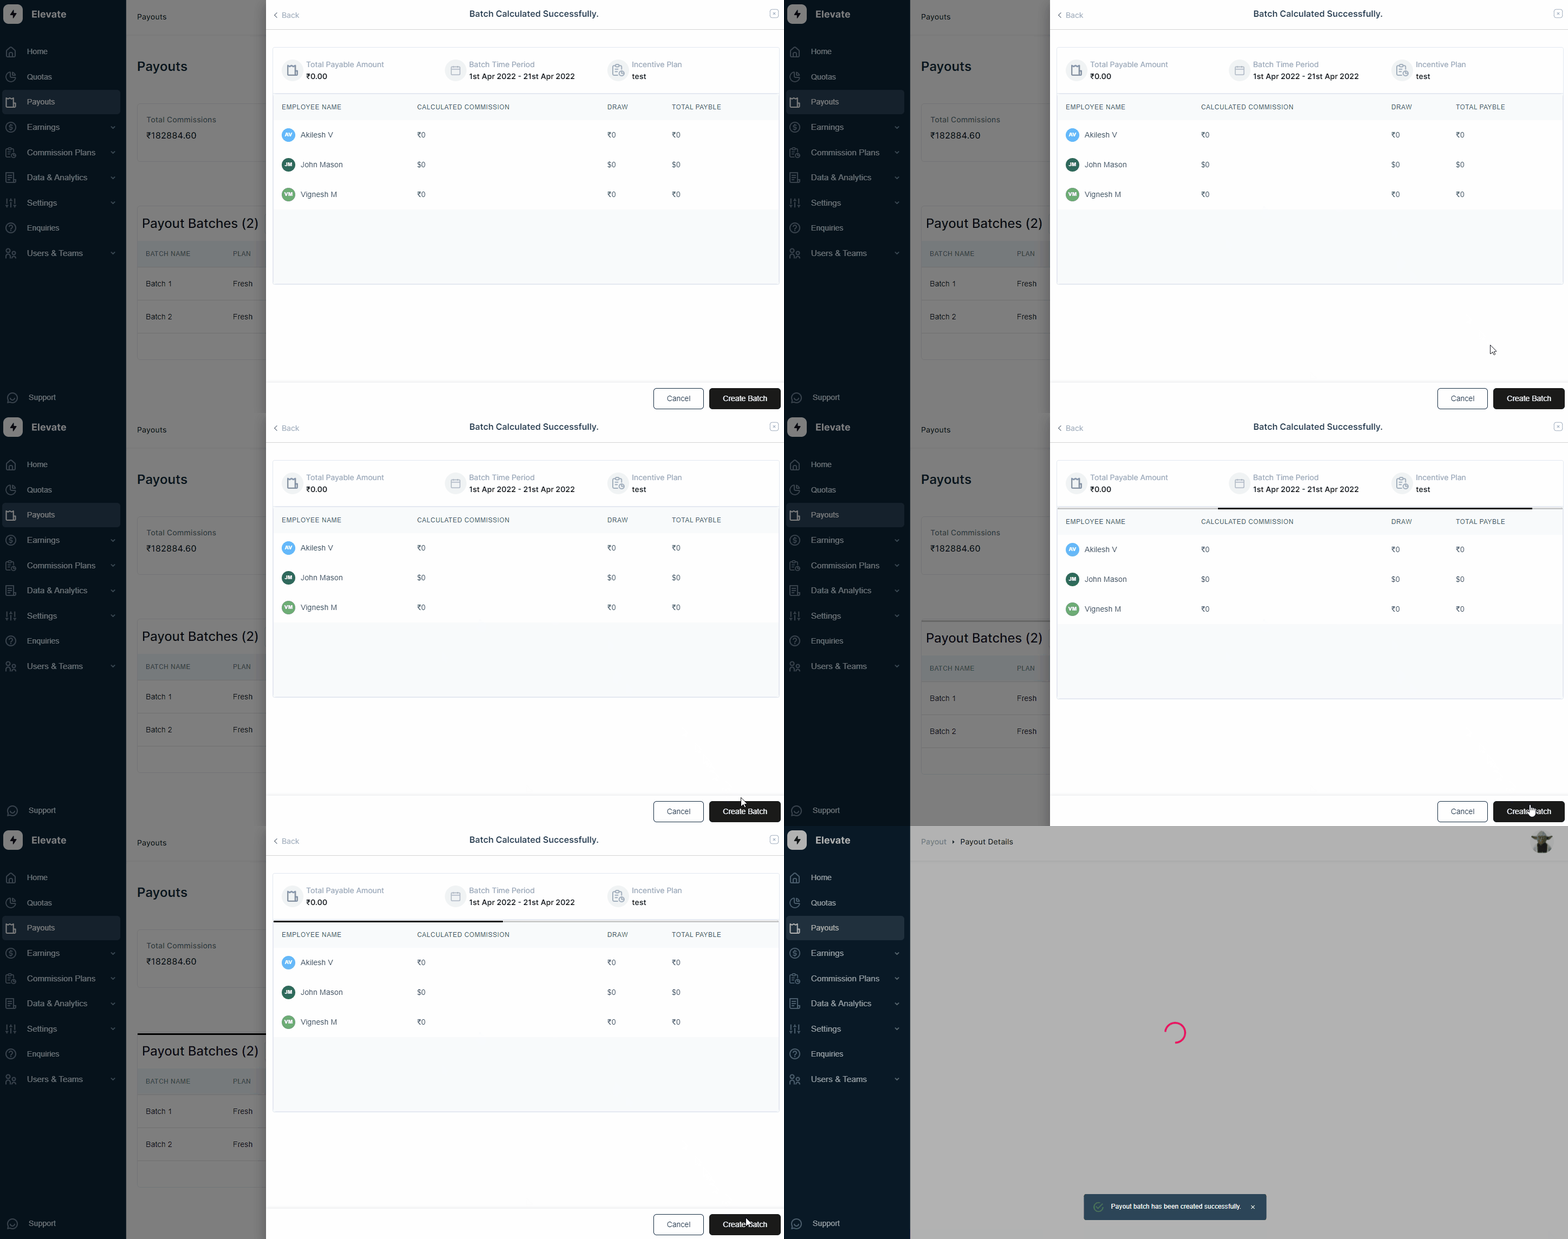
The system will calculate the commissions for the selected employees. You can double-check the list before selecting “Create Batch” after which the payout batch will be created.
Step 5:
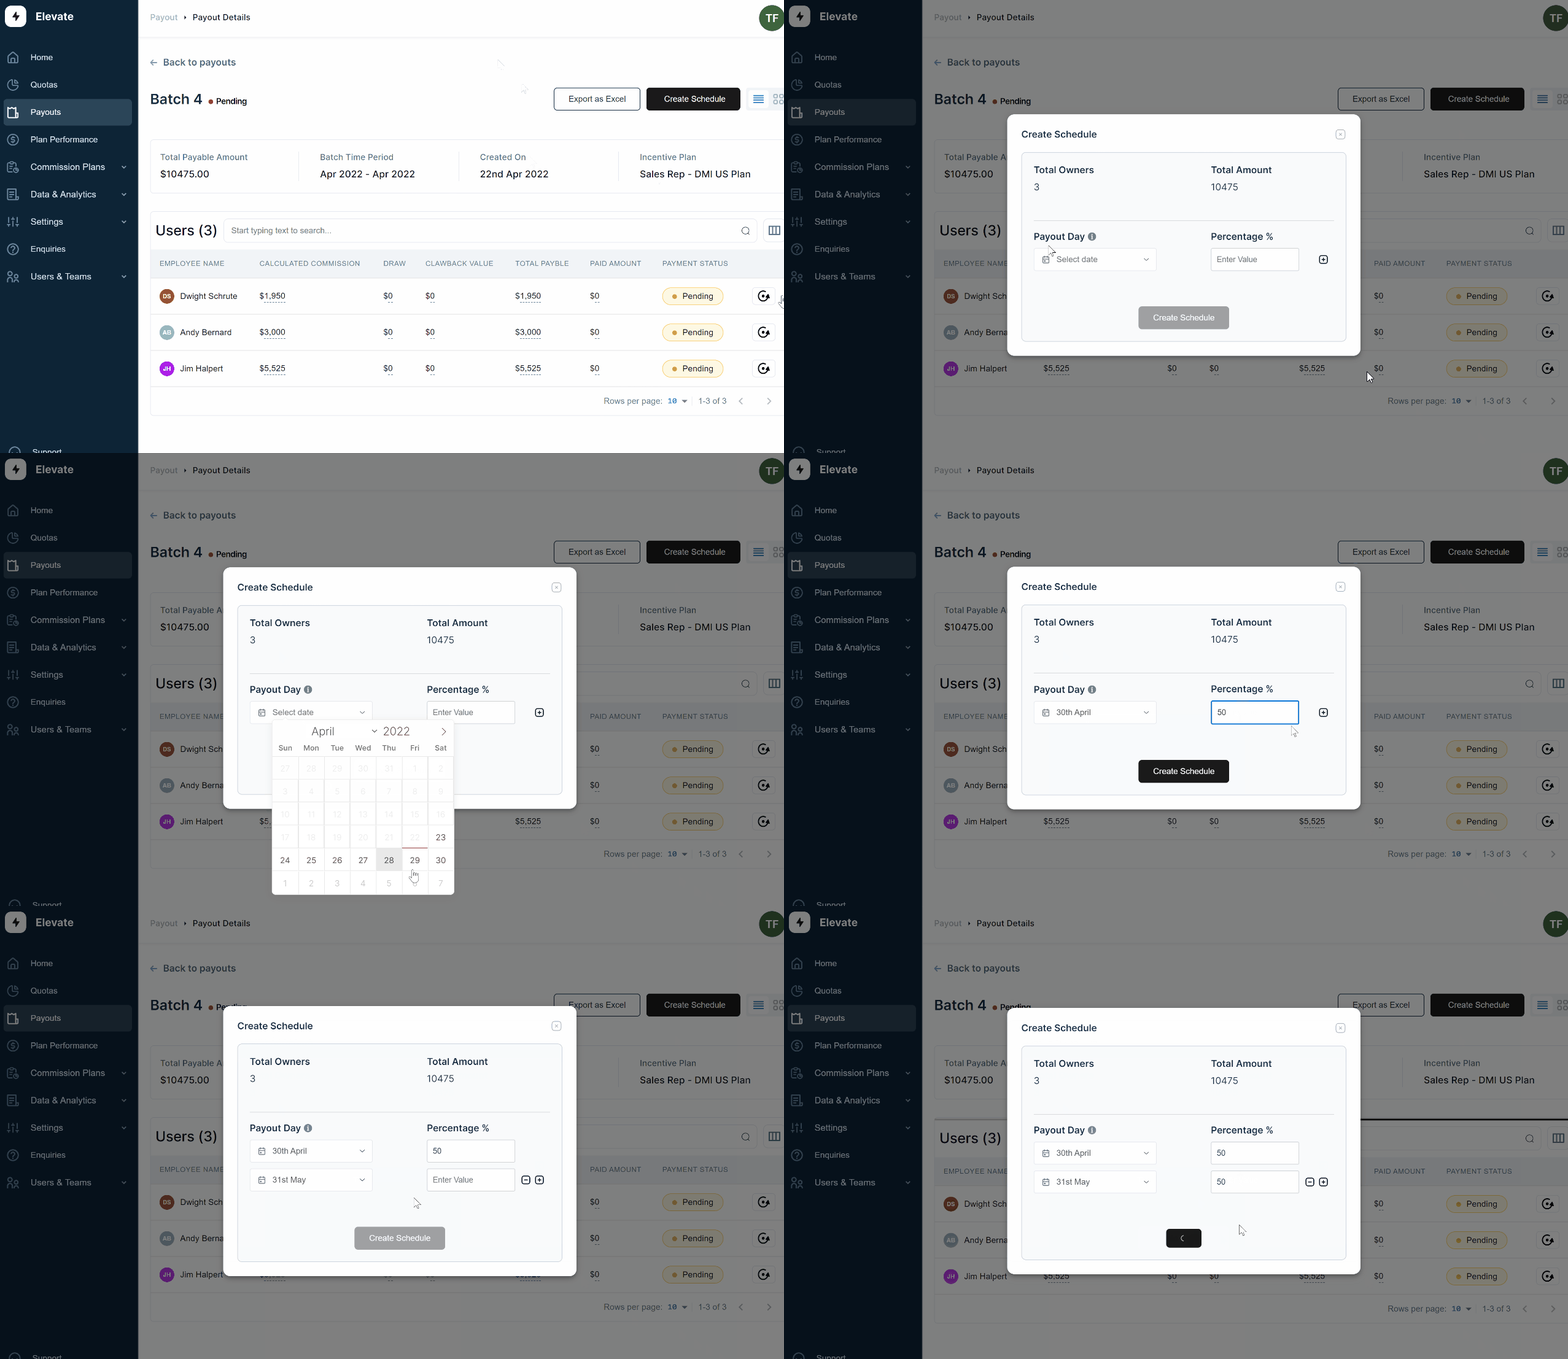
Once the batch has been created, the system will now ri-direct you to the payout. If you pay your reps in instalments, you can even divide a payout batch into multiple payouts, click on “Add schedule” on the top right corner. The system will open a new window. Here you can add the date and the “payout day” and “percentage”. Once you have allotted the details click “Create Schedule”.
Step 6:
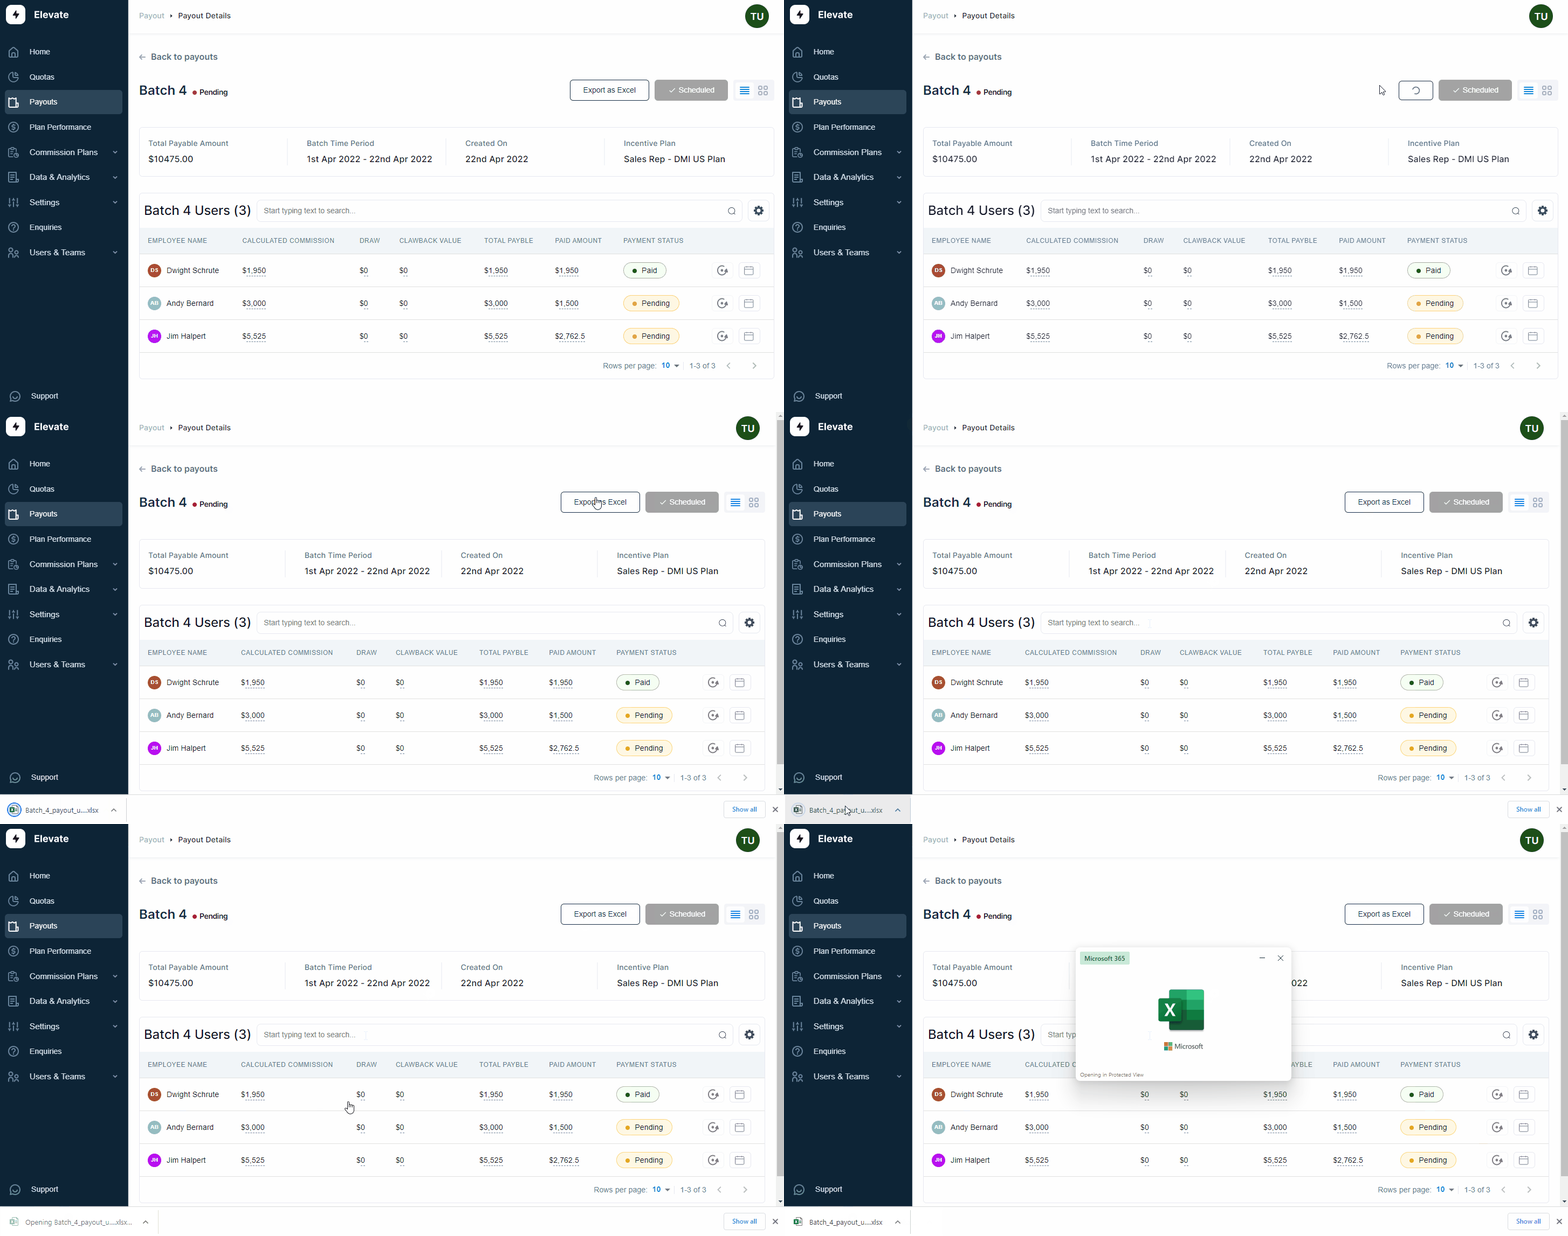
Once you have created a payout, you can choose to export the file as an excel by clicking on “Export as Excel” button on the top.
Step 7:
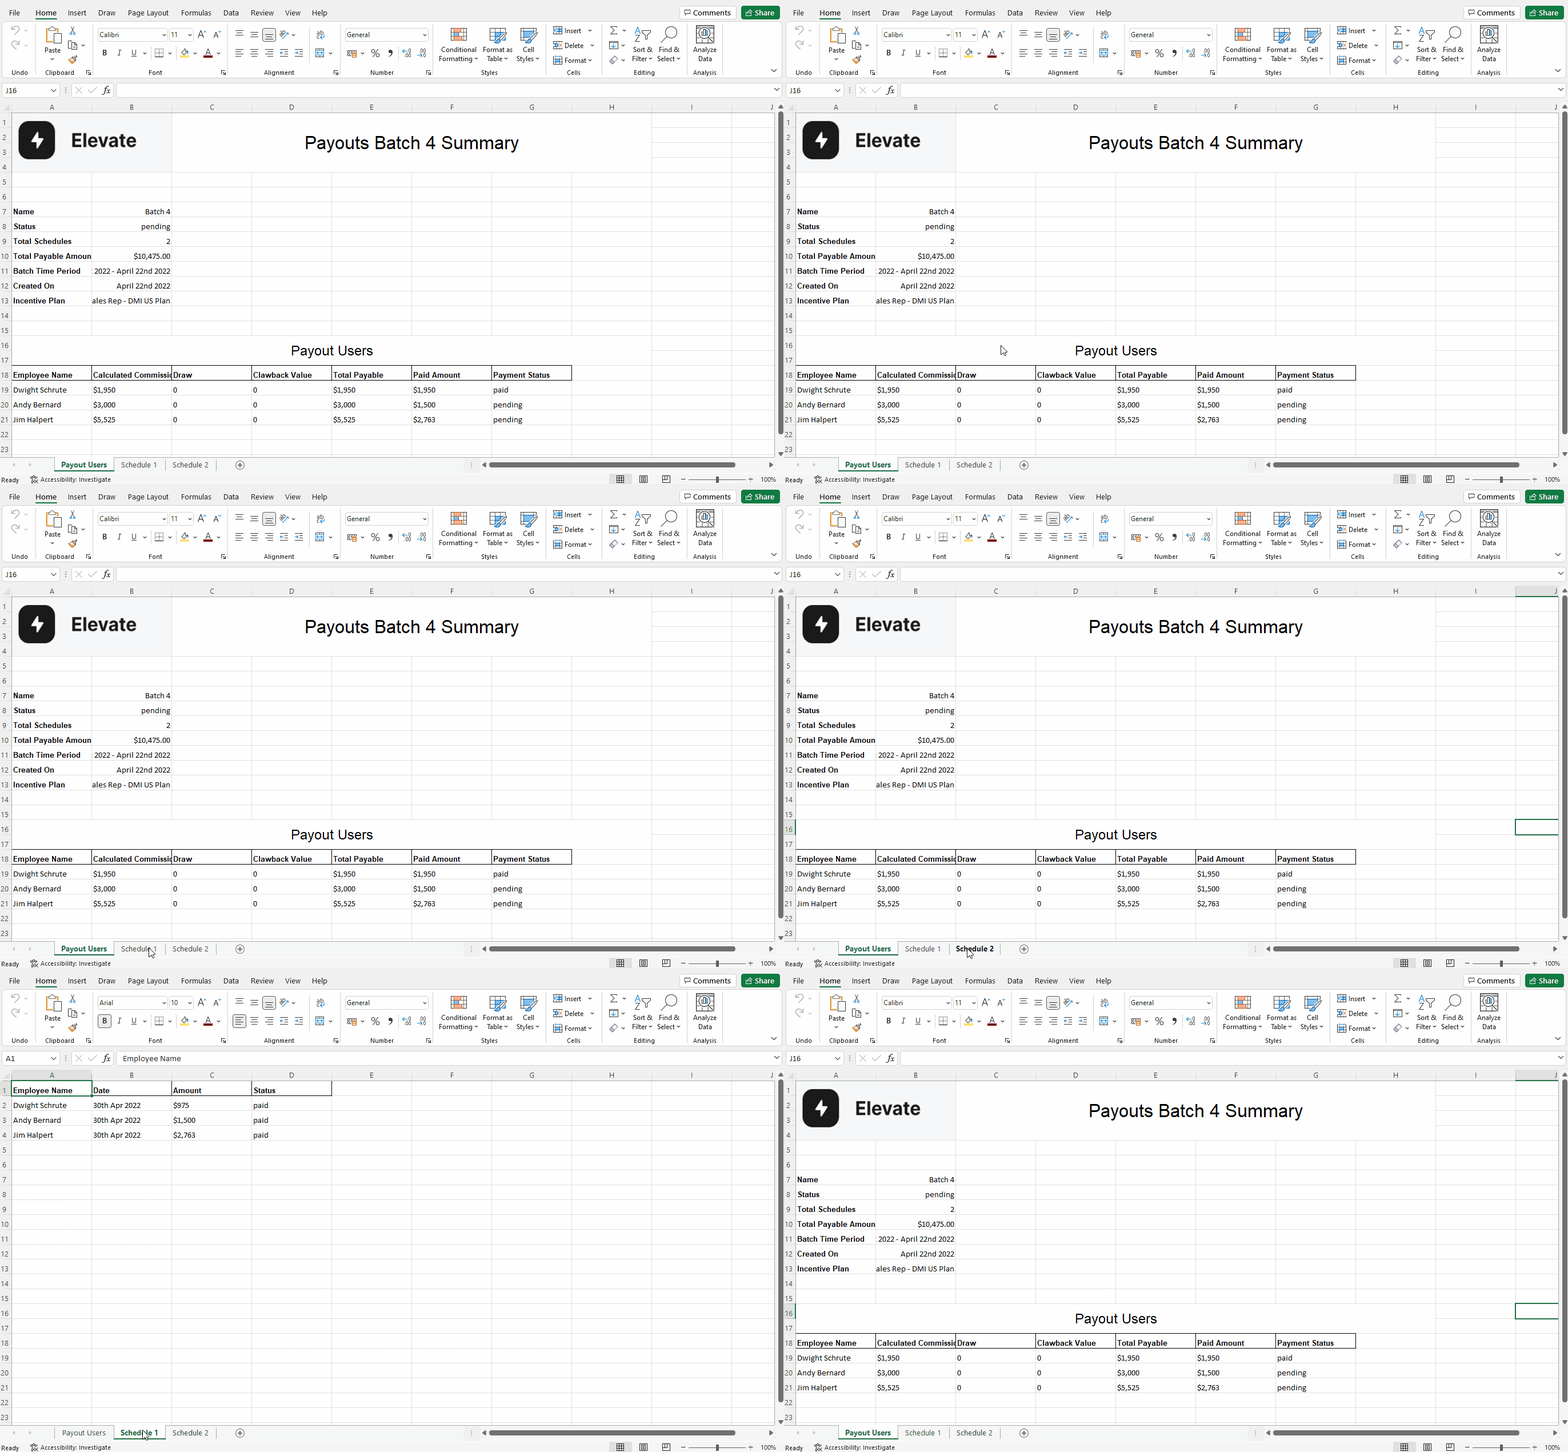
The file will then be exported as an excel summary for your reference as shown.
Step 8:
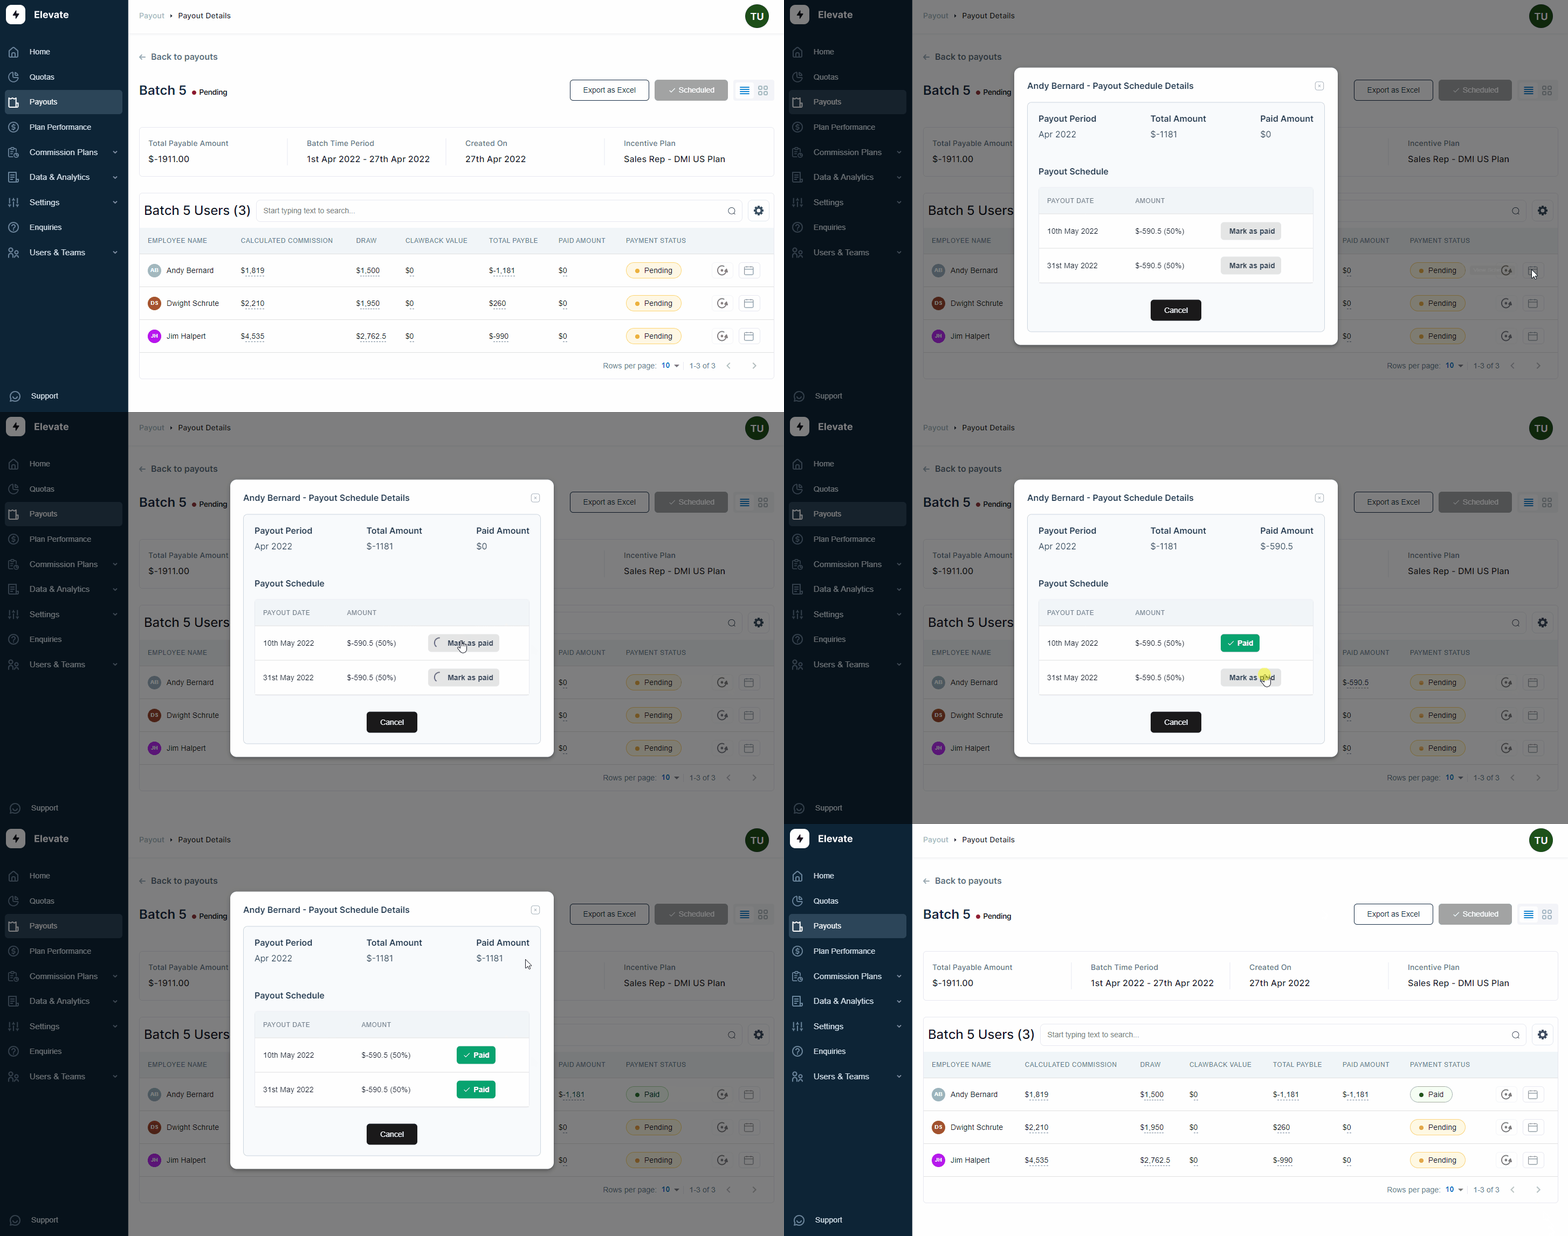
After you have paid your reps based on the schedule, you can go back to the payout batch & click on “view schedule”. The system will open the schedule window, here you can mark the payment as paid. This will then send out a notification to the rep mentioning he/she has received the payment.
Related Links

Payouts
ElevateHQ Payouts manager lets you create timely payout batches...

Freeze
In this tutorial we will learn how to freeze a rep's commissions ...

Quota Ramp
Wish to create a quota ramp for a new employee? In this tutorial...


